
To use a stack, create a stack container for an existing archive.
The basic steps to creating a stack are:
The stack type determines how, and where, the stack can be stored.
There are four stack container types:
Select the type, then follow the steps in the appropriate section.
A document stack writes the stack data into a package (folder) and is compatible with virtually any filesystem macOS can write to. Document stack containers can be written to an external drive, a NAS device, a remote server, many so-call "cloud" drives, and so on.
Choose the stack type if, for instance, you want to maintain an off-site copy of your archive on an portable drive.
The location and name of the document stack container is determined when you are prompted to create it, so there is no additional information to provide at this step.
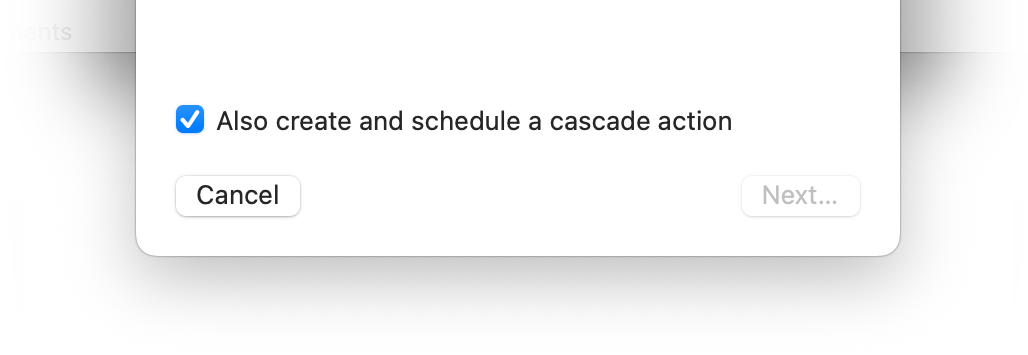
To proceed, click Next…. Navigate to the location of the new stack container, give it a name, and click Create. Finally, edit the stack's settings and adjust the cascade action's schedule (unless you opted-out).
The cloud drive type stores the stack data inside a folder on a synchronized cloud drive. Apple's iCloud Drive is supported, as well as any third-party synchronized cloud drive service provided via a File Provider Service (macOS 13.1 or later).
As of this writing, all of the major retail cloud storage services have modern synchronized cloud drive implementations available, including DropBox, Google Drive, Microsoft One Drive, and others.
To proceed, click Next…. Navigate to a synchronized cloud drive (iCloud Drive, DropBox, …), give the container a name, and click Create. QRecall will verify that the location selected is on a supported cloud drive.
Some synchronized cloud drives have options that can interfere with QRecall's management and access of the stack container data.
Specifically, drive options that "keep local copies of all files" will probably not work well with QRecall as it will force the drive to maintain a local copy of the entire stack, which can be very large. The drive should be configured to automatically upload/synchronize any locally created files, and automatically decide when local copies are discarded and re-downloaded.
QRecall uses the File Provider Service API to verify that newly written data has been successfully synchronized with the cloud, to "evict" files (request that a local copy not be kept) for files that don't need to be, and to verify that files are up-to-date.
You will also typically find some commands at your disposal that will interfere with this process, and it is recommended that you do not "fiddle" with the contents of the stack container folder.
It's generally safe to request that stack container files be released from the local storage and kept only in the cloud. Examples of such commands are , , , and so on.
It is generally recommended that you do not manually request any container files be downloaded manually, and certainly don't make any requests to turn off synchronization, or similar actions, as this could result in stack data loss.
Finally, edit the stack's settings and adjust the cascade action's schedule (unless you opted-out).
An AWS stack is stored as data objects inside an AWS S3 bucket. To store your stack using Amazon Web Services you will need:
An access key is created in your account's Security Credentials, which you can navigate to either from your account drop-down or in the Identity and Access Management (IAM) section. Create an access key for an "Application running outside AWS". Once created, you will be presented with its identifier and its "secret" (a long string of random characters). You must save the secret somewhere safe. Neither Amazon nor QRecall will show the access key secret again.
Navigate to the S3 Services control panel and create a bucket†. You can store multiple stacks in the same bucket.
† As of this version, QRecall does not yet support versioning or object locking. Your bucket needs to be configured with versioning and object locking turned off (which is the default).
Now you are ready create your AWS stack container. Select as your stack type and fill in following information:
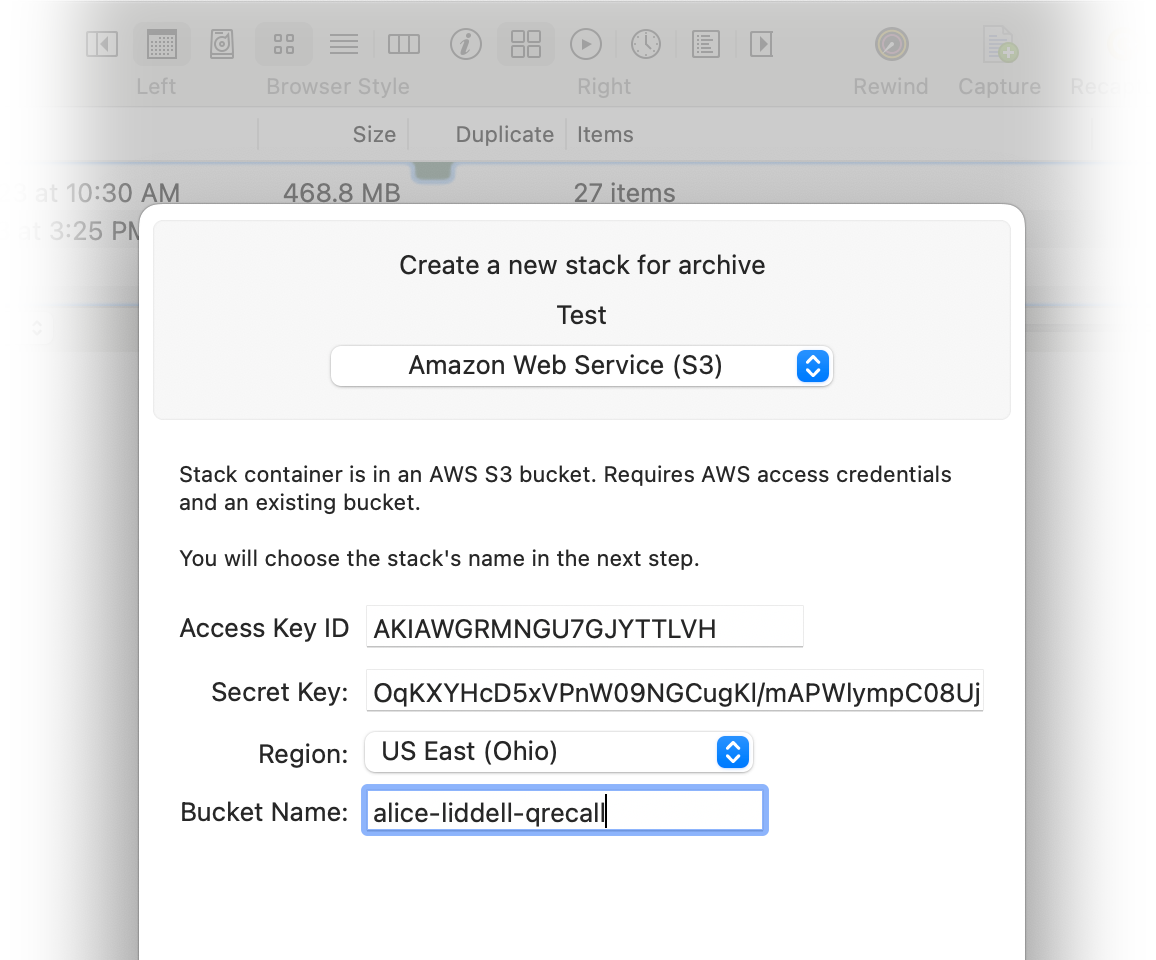
Click Next…. If all of the access key and bucket location information is correct, QRecall will read the bucket and list any other stacks already in that bucket.
Enter the name of the new Stack and click Create. Finally, edit the stack's settings and adjust the cascade action's schedule.
Many companies, institutions, and universities operate object storage services that are functionally compatible with Amazon's S3 Service. There are often monetary, performance, security, and even political advantages to using an S3 service other than Amazon's.
QRecall can use most S3-Compatible services, with just a little additional configuration.
The information and steps are essentially the same as for the Amazon Web Service (S3) stack container type (see preceding section), but the details have to be manually configured.
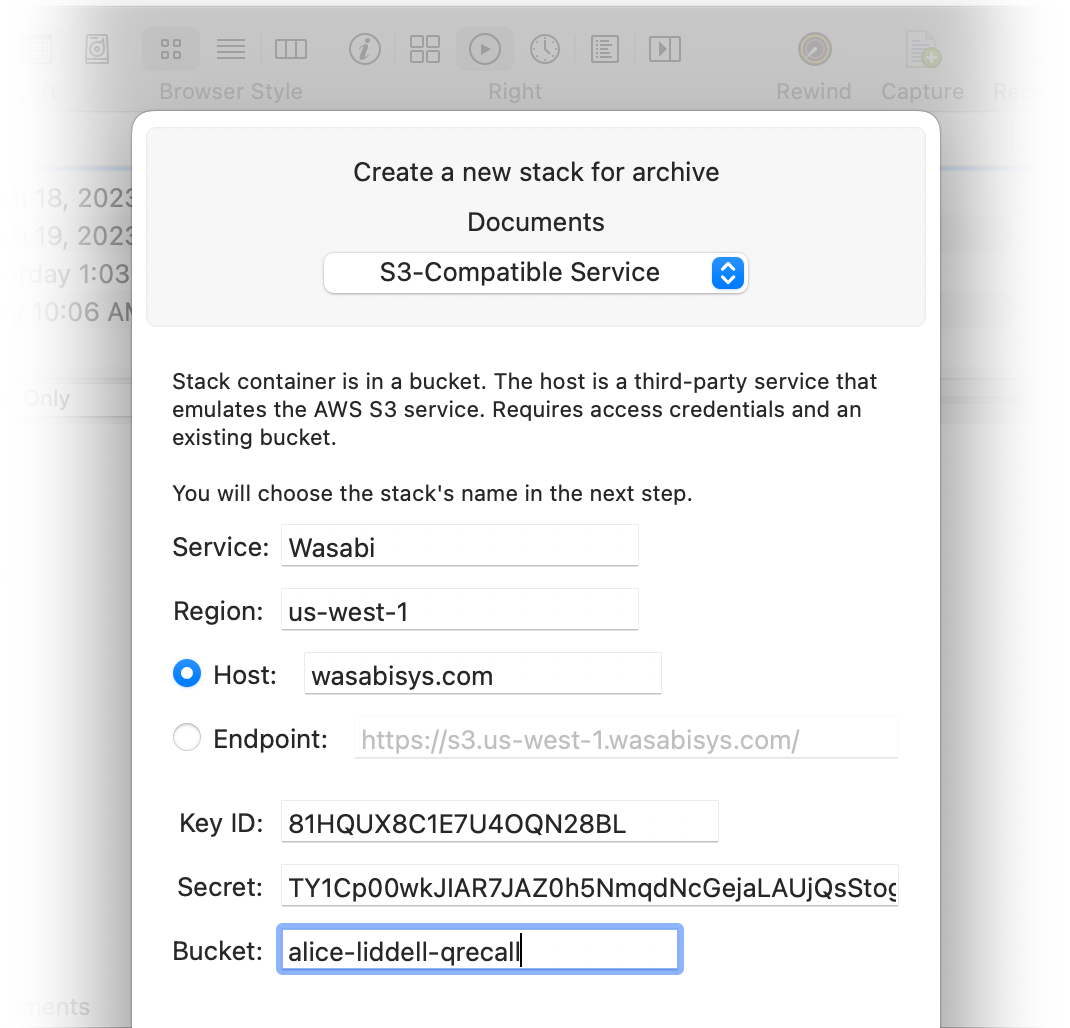
Begin by giving your service a name, so it's easy to identify. Then configure the rest of the service connection details:
Access Key
Like AWS, you will need an access key with an identifier and a "secret". Refer to your service's documentation or administrator about obtaining an access key suitable for use by a third-party application.
Region
Enter the region identifier (such as
eu-central-0) where your bucket resides. Again, refer to the documentation for your service.Host or Endpoint
If the S3-compatible service uses the standard Amazon convention for an S3 URL (i.e.
https://s3.some-region-id.some-service.com/), then select Host and enter the service's domain name (such asblackblazeb2.com). QRecall will construct the access URL from those pieces.If the service uses a custom S3 URL, select Endpoint and enter the entire URL preamble, such as
https://s3.data-collection.oceanic-sci.princeton.edu/.Bucket
Enter the name of the bucket you have created or were assigned.
Click Next…. If the access key, bucket location, and host information is all correct, QRecall will read the bucket and list any other stacks already stored there.
Enter the name of the new Stack and click Create. Finally, edit the stack's settings and adjust the cascade action's schedule.